
An OpenThread Quest: Preparing a nRF52840 dongle

You want to build your own OpenThread network, so you have bought an nRF52840 dongle and want to use it for the border router. But the dongle comes clean and documentation is confusing. So you are ready to believe this random blog you just found. Good!
What you'll need
- A nRF52840 USB stick. I am using this product from AliExpress, but I know for a fact that at least Makerdiary has a compatible one. Any USB based on the nRF52840 chip should work.
- A Linux computer where you can build sources. It should be an
amd64machine, meaning that it cannot be a Raspberry Pi or similar SBC.
Some architecture overview
If you are not interested on how the USB will work, you can skip this section. But I like to include a little bit of information about the two main architectures that can be used for your OpenThread dongle.
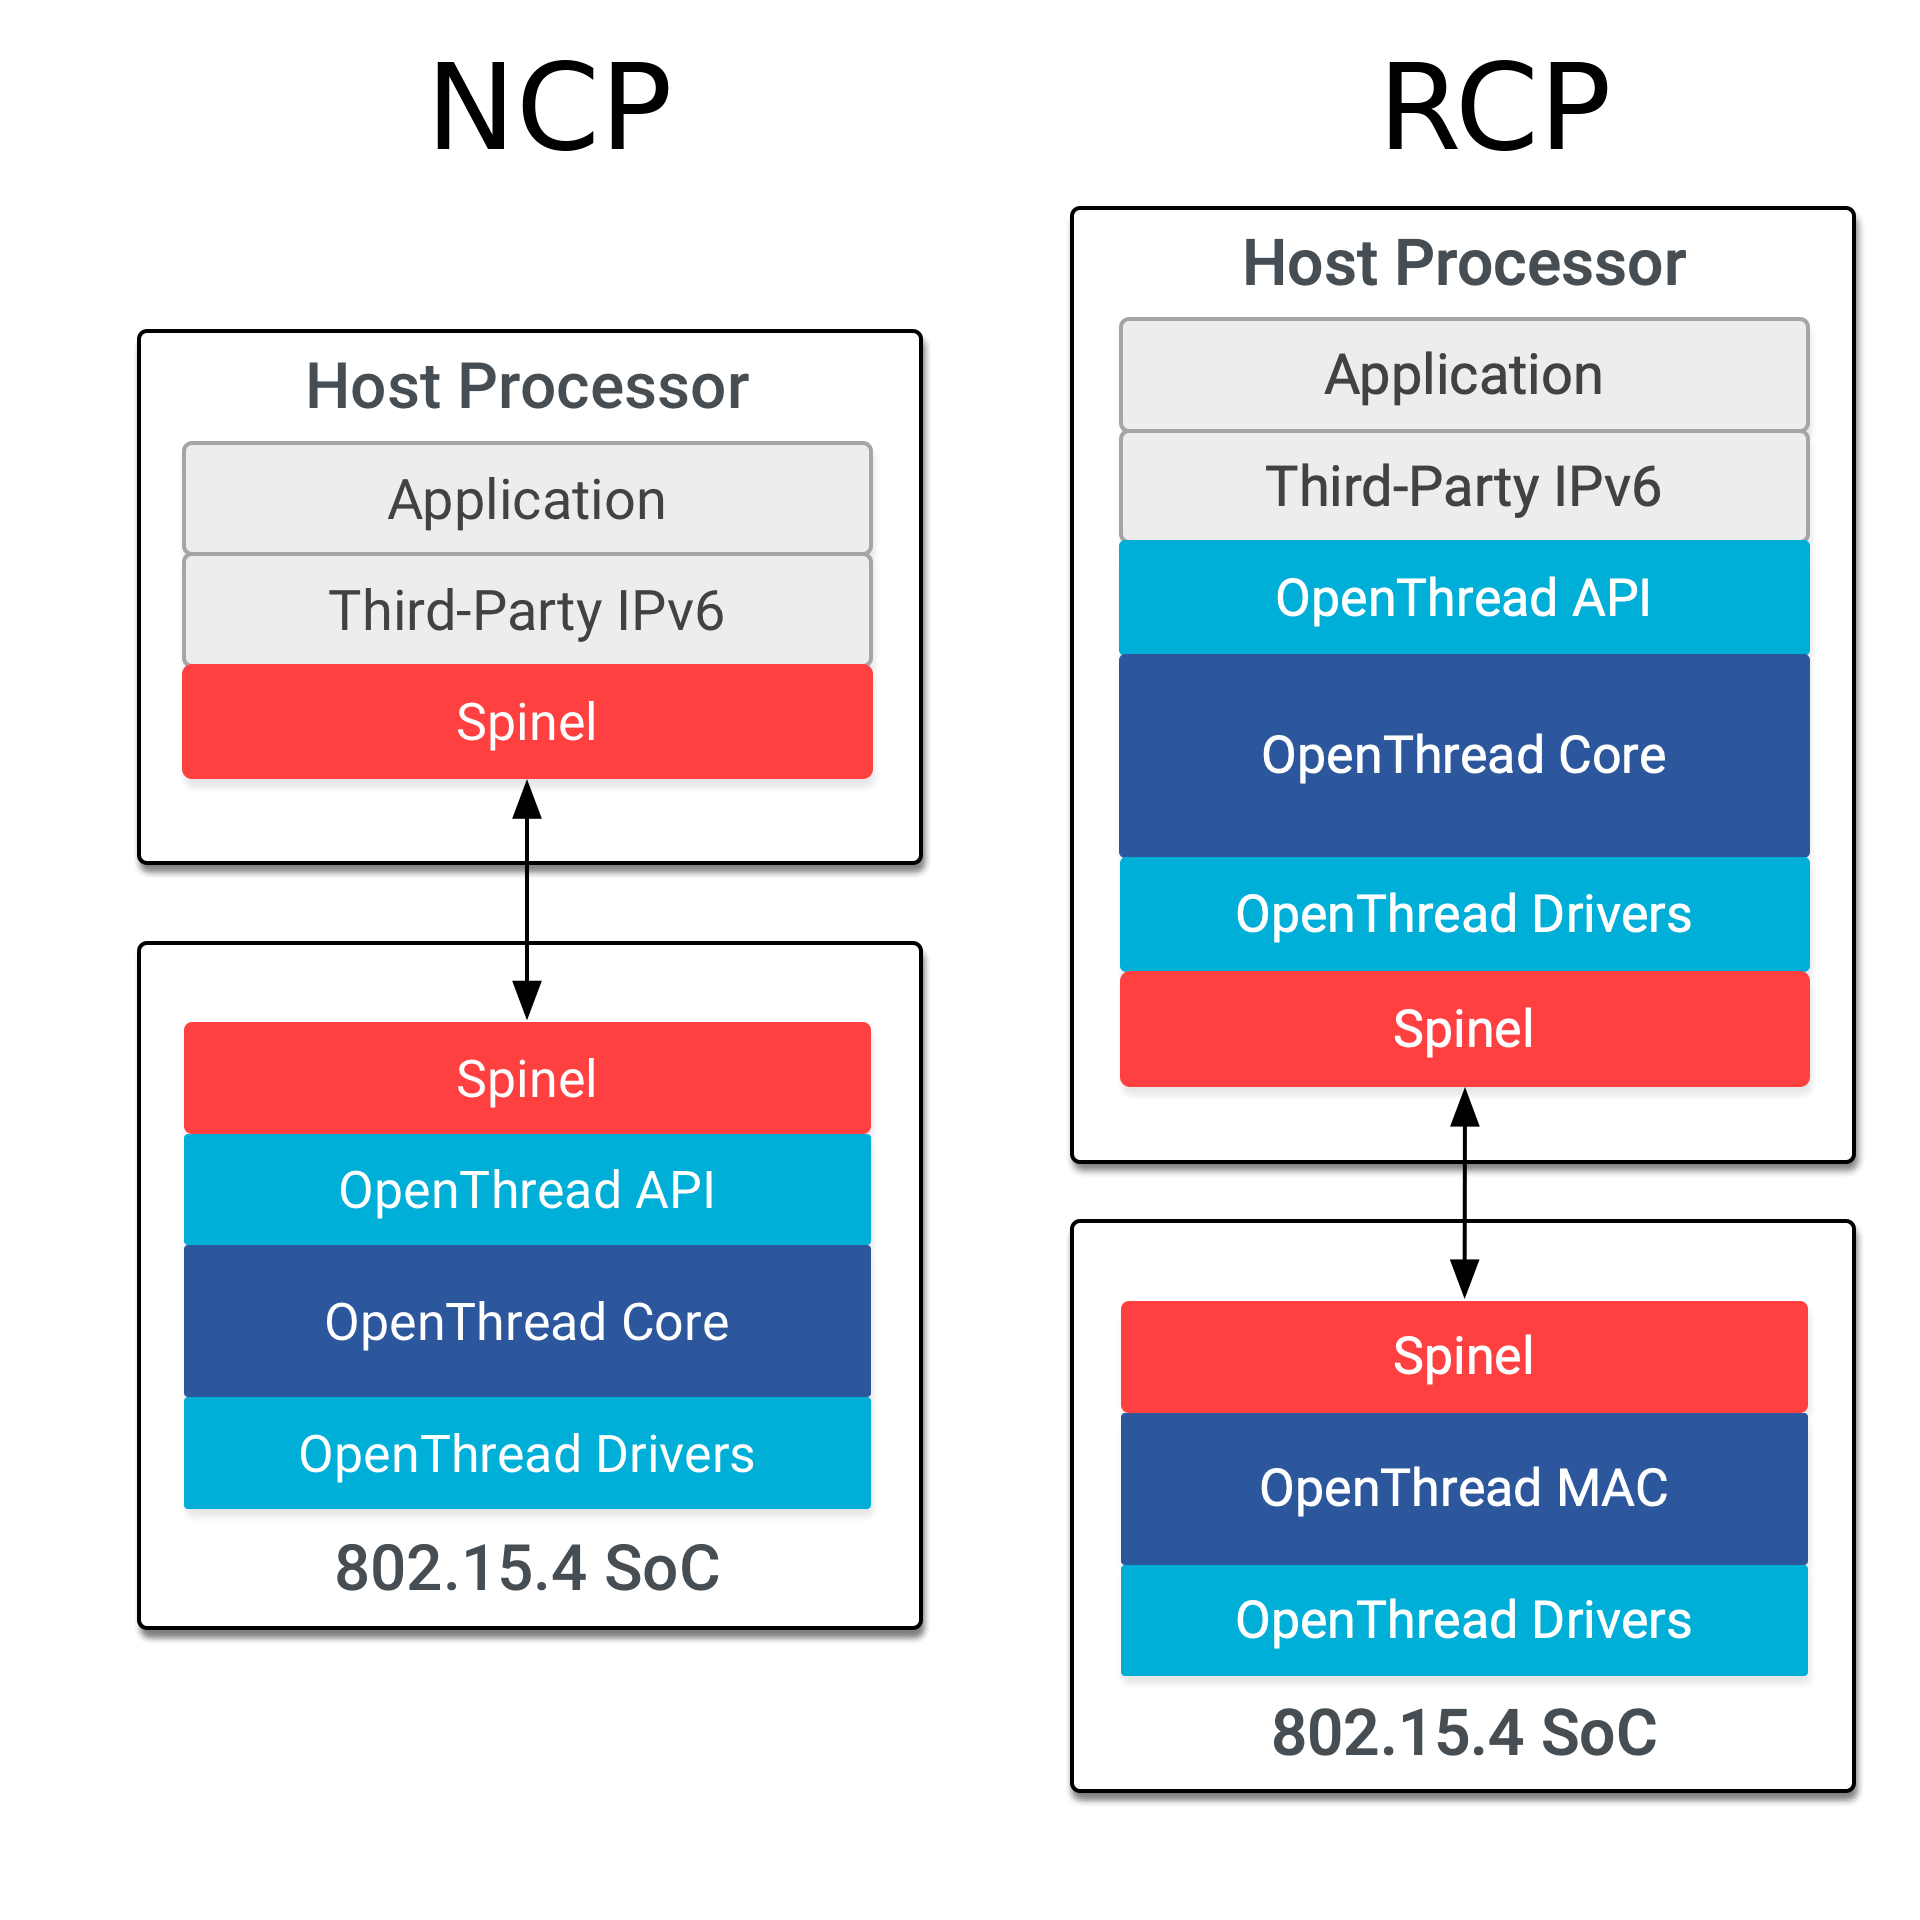
Let's start with the legacy one, the Network Co-Processor (NCP). I say it is deprecated because wpantund is deprecated and thus it defeats the purpose. In general, the NCP architecture keeps the host processor complexity lighter, but that is not relevant when we are using a USB that will be plugged to a Raspberry Pi --which is plenty powerful in this context.
The other architecture, the one I will be using is the Radio Co-Processor (RCP). This is the current preferred approach. One can see that all the OpenThread-specific code lives in the host processor (i.e. the Linux machine that will be running the software). The 802.15.4 SoC (i.e. the nRF52840 USB dongle) will be minimalistic.
For the RCP architecture, the software that will run in the Linux machine will be the ot-daemon. However, that software is not the focus of this entry. The software aspect is discussed in An OpenThread Quest: My IPv6 Border Router, in this same blog.
Building the firmware
# Clone the OpenThread repository
$ git clone --recursive https://github.com/openthread/openthread.git

# Bootstrap it
$ cd openthread
$ ./bootstrap

# Build for nRF52840
$ make -f examples/Makefile-nrf52840 clean
$ make -f examples/Makefile-nrf52840 USB=1 BOOTLOADER=1 BORDER_AGENT=1 BORDER_ROUTER=1 COMMISSIONER=1 JOINER=1 UDP_PROXY=1 CFLAGS+=-UCONFIG_GPIO_AS_PINRESET

# Convert to .hex format
$ cd output/nrf52840/bin
$ arm-none-eabi-objcopy -O ihex ot-rcp ot-rcp.hex
Full disclaimer: I am not sure if all the make flags are needed or what is their exact meaning. I got them from the Makerdiary documentation and seems to work for my dongle. So I'll stick to those flags.
Flashing the firmware
I'll be using the nRF Connect for Desktop graphical user interface. It is easy to use, and gives meaningful information for non-experts like myself. Feel free to use the command line tools if you are comfortable with those. Once installed, install the Programmer app, as that is what we will be using.
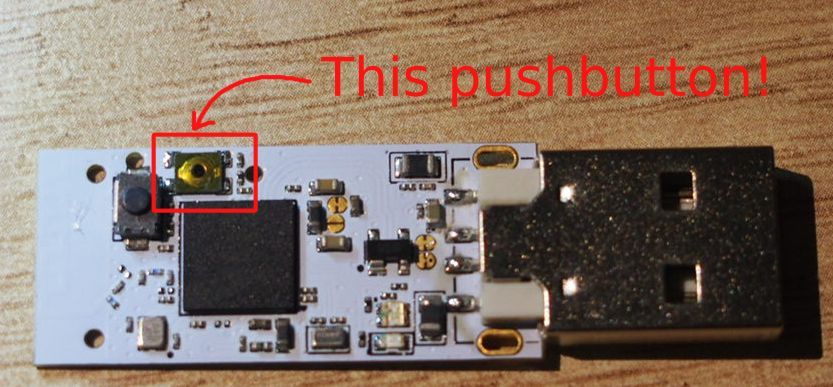
If you are using the same device as myself, take into account that the reset switch to enter into programming mode is not the prominent switch. Instead you will need to disassemble the casing and use the small button that doesn't even seem a button!
Once you have properly entered into the programming mode and the nRF Connect tool is recognizing the dongle, you can proceed to flash the .hex file (you click the Add HEX file and select the ot-rcp.hex that we built in the previous step).
Next steps
Well, I have it a little bit drawbacks in the blog, as I already published it. But the idea is that now you have an OpenThread dongle and that will allow you to build your own OpenThread Border Router. The previous entry on the AOTQ series is on how I built my own Border Router. It is very opinionated but hopefully instructive for everyone: An OpenThread Quest: My IPv6 Border Router.